Threading a sewing machine can seem tricky at first, but it gets easier. In this guide, I will take you through the steps. I’ll explain each part clearly and make sure it’s easy to follow. By the end, you’ll confidently thread your machine every time. Let’s get started!
What Do I Need to Get Started?
Before we start threading, let’s make sure we have everything we need. Here’s a simple checklist:
- Sewing machine
- Spool of thread
- Bobbin (with matching thread)
- Scissors
Step 1: Preparing the Machine
I always begin by switching off my sewing machine. This step ensures safety. Once the machine is off, I lift the presser foot. Lifting the foot helps to prevent tangling during threading. Next, I raise the needle to its highest point using the handwheel on the side of the machine.
Most sewing machines have a little diagram showing the threading path. I find it helpful to follow this guide. If you don’t have one, don’t worry! I’ll walk you through each part.
Step 2: Placing the Spool of Thread
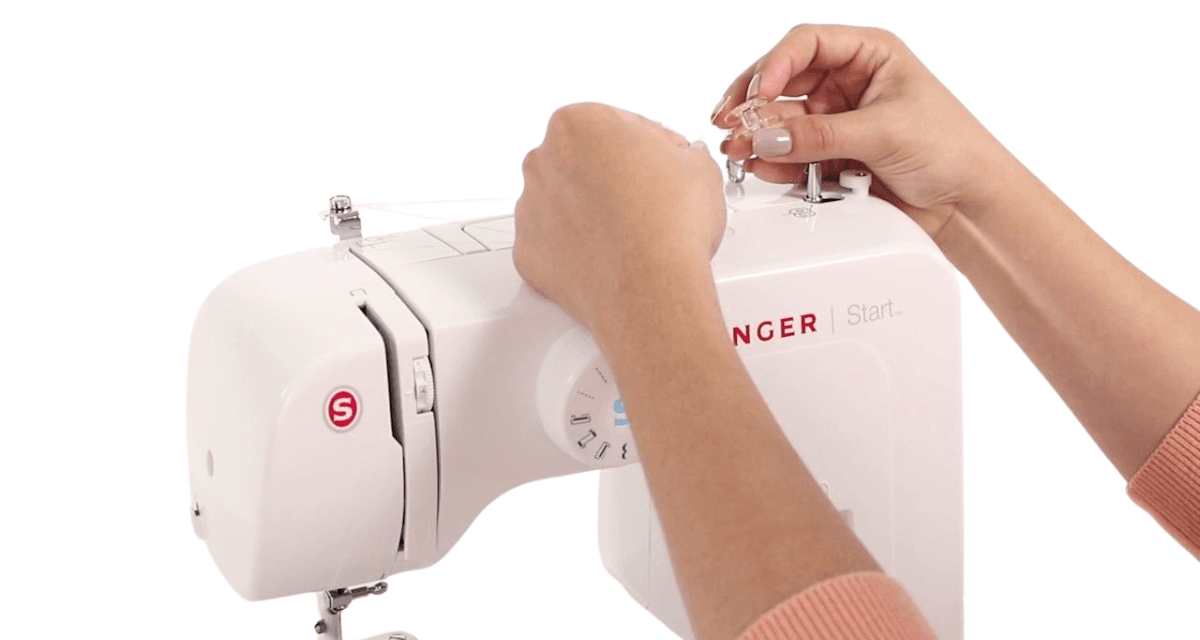
The next step is placing the spool of thread on the machine. On top of most sewing machines, there’s a spool pin. I place the spool of thread on this pin. Then, I make sure the thread unwinds smoothly from the spool. Some machines have a horizontal spool pin, while others have a vertical one. Either works, as long as the thread unwinds freely.
Step 3: Threading the Upper Thread
Now, we’re getting into the details. Threading the upper thread is the main part of this process. Here’s how I do it:
- Guide the Thread: I take the end of the thread from the spool and pull it towards the front. The thread must pass through the first guide near the spool.
- Pass Through the Tension Discs: Most machines have tension discs that control the thread’s tightness. I guide the thread down and around the tension discs. You’ll often see a small slot to guide the thread into.
- Thread the Take-up Lever: This is an essential step! The take-up lever is a small hook-like part that moves up and down as you sew. I pull the thread up, making sure it catches in the lever.
- Guide to the Needle Area: Now, I bring the thread down towards the needle. The thread should go through the thread guides near the needle area.
- Thread the Needle: Finally, I thread the needle. If your machine has a built-in needle threader, this part is much easier. If not, I cut the thread to make a clean edge, then carefully guide it through the needle’s eye.
Step 4: Loading the Bobbin
Now that the top thread is ready, it’s time to load the bobbin. The bobbin holds the lower thread, which is just as important. I always use matching thread on both the spool and the bobbin.
- Remove the Bobbin Case: Most machines have a removable bobbin case. I gently pull it out. Some machines have a drop-in bobbin instead, so check your manual.
- Place the Bobbin in the Case: I hold the bobbin so the thread pulls in the correct direction. Usually, it should pull clockwise, but this depends on the machine. I place it in the case and pull a bit of thread through the slot.
- Insert the Bobbin Case: After loading the bobbin, I insert the case back into the machine. I make sure it clicks into place securely.
Step 5: Connecting the Upper and Lower Threads
Now that both the upper thread and bobbin are ready, I need to connect them. Here’s what I do:
- Hold the Upper Thread: I gently hold the upper thread with my left hand. This keeps it out of the way.
- Turn the Handwheel: Using my right hand, I turn the handwheel towards me. This lowers the needle, and as it comes up, it pulls the bobbin thread with it.
- Pull the Bobbin Thread: I gently tug on the upper thread, and the bobbin thread will loop up through the needle plate. Then, I pull both threads to the back of the machine.
Step 6: Ready to Sew!
That’s it! The sewing machine is now threaded and ready to use. I always do a quick test on a scrap of fabric to make sure everything is working. If the stitches look uneven, I might adjust the tension slightly.
Troubleshooting Common Threading Issues
Even when I follow all the steps, threading problems can happen. Here are a few common issues and how I fix them:
- Thread Breaking: If the thread keeps breaking, it might be too tight. I adjust the tension dial to a lower setting. Also, I check that the thread is good quality and not fraying.
- Skipped Stitches: Skipped stitches can be frustrating. It usually happens if the needle isn’t threaded correctly. I double-check that the thread is in the take-up lever and that the needle is the right size for my fabric.
- Loose Bobbin Thread: If the stitches look loose on the bottom, I check the bobbin. Sometimes, the bobbin thread hasn’t been pulled through the slot correctly. I also check the bobbin tension.
Tips for a Smooth Threading Process
After threading my machine many times, I’ve picked up a few handy tips. Here’s what makes the process smoother for me:
- Use Good Lighting: Threading is much easier when I have enough light. A desk lamp or natural light helps a lot.
- Trim the Thread: Before threading the needle, I always cut the thread at an angle. This makes it easier to pass through the needle’s eye.
- Use Tweezers: If I’m struggling to thread the needle, tweezers come in handy. They help guide the thread without much fuss.
Keep Your Machine Clean
A well-threaded machine runs smoothly, but a clean machine runs even better. Dust and lint can build up inside the machine and cause problems. After every few projects, I give my sewing machine a quick clean. I use a small brush to remove lint from the bobbin area and tension discs.
Wrapping Up
Now that you’ve learned how to thread a sewing machine, I’m sure it feels less daunting. Like anything, it takes a bit of practice, but soon it will become second nature. With the machine properly threaded, you’re ready to sew anything you like!
Remember, if something goes wrong, don’t worry. Just take a deep breath and check the steps again. In no time, you’ll be back to sewing smoothly. Why not explore our popular dressmaking fabrics range. From top brands to everyday materials, we have a huge range for you.


